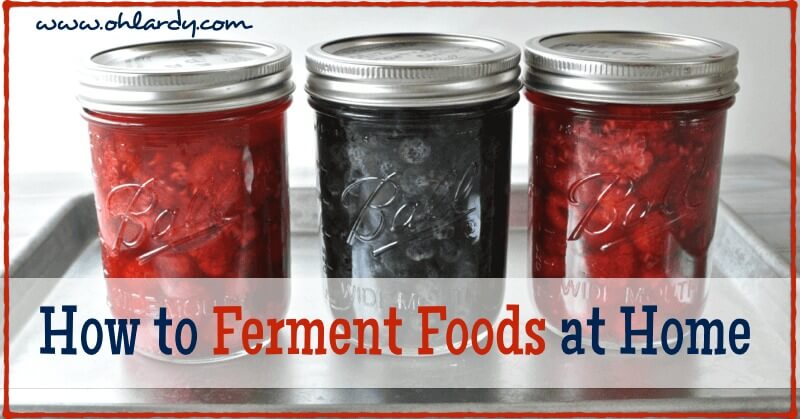
How to Make Fermented Foods
Oh Lardy! is a participant in the Amazon Services LLC Associates Program, an affiliate advertising program designed to provide a means for us to earn fees by linking to Amazon.com and affiliated sites.

Culturing or fermenting foods is a way of easily preserving foods and at the same time encouraging the growth of good bacteria (probiotics) which have numerous health benefits.
Some of the benefits of consuming fermented foods are restoring proper balance of bacteria in your gut (should be 80-20 ratio good-bad; most of the time is not due to our SAD diet), providing enzymes which aid in digestion and enhancing immune system.
When I first started my journey into the world of Real Food, I never would have thought of buying cultured foods (except yogurt maybe), let alone making my own. I remember reading about fermenting on various blogs, in my Nourishing Traditions book (a Real Foodie bible) and would just skip over those posts/recipes and think ‘too complicated', ‘too confusing', ‘what are they even talking about.'
Now I can share with you how to make fermented foods at home.
Possibly you are thinking the same thing! Wait! Give it a chance!
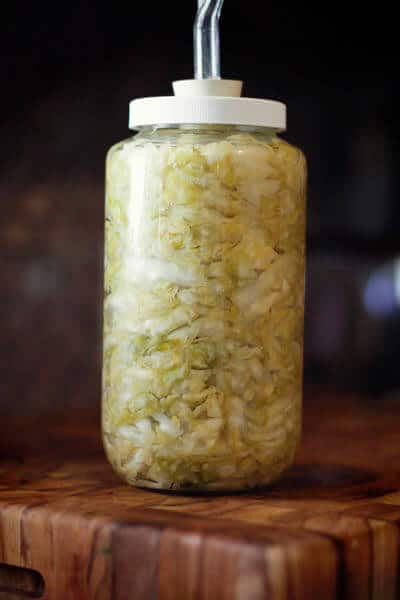
The first time I was brave enough to try a recipe, I gathered lacto-fermented sauerkraut recipes from around the blogosphere and in my cookbooks. I discovered many of the sauerkraut recipes were the same…and yet so different. Some called for whey (what?), some called for starter culture (sounds confusing), some had lots of salt, some a little salt, some called for mashing the cabbage to create a brine, others called for filtered water. What in the world? Confused…I just walked away from fermenting and continued ignoring it every time I read about the benefits.
Then, I went to a meeting of my local Weston A Price chapter, and a member (who also is a CHFS) taught a class called “Fast Ferments.” She broke it down into easy steps and made fermenting seem less confusing to me. Inspired, I raced home and fermented all sorts of goodies with success! I hope that I, too, can help break it down for you!
The purpose of this post is to go over the materials you need to ferment your own fruits and vegetables at home. This is such a cost effective way of getting trillions and trillions of beneficial bacteria into your gut. A serving of fermented vegetables can contain more bacteria than an entire bottle of some probiotics!
This post is about controlled fermenting (where you add your own bacterial starter and keep the lid closed). You can wild ferment, but I do not care for that method, personally. I have much better success with a controlled ferment. (Here's a post on wild fermented beet kvass, if you are interested).
Side note: You can ferment dairy, but this post will be solely about fruits and vegetables. I am not very experienced at making my own cultured dairy (although I have been experimenting!), so will leave that for another time!
The Basics
Essentially a cultured fruit or vegetable is simply a fruit/vegetable that is placed in a jar/container. An inoculant or starter (something that has added beneficial bacteria) is added to the jar. Salt can sometimes be used as well (optional). Then the jar is filled to within an inch of the top with water or other liquid. The jar is closed tightly with a lid and left out at room temperature for 2-10 days (sometimes longer). After the ferment is complete, the food can be safely kept in the refrigerator (38 degrees) for up to a year. (Except fruit, that should be consumed within 2 months). You will have a safely preserved, probiotic rich, living food to use as a condiment, to add to salsas, dips, smoothies…whatever! Here are the rest of the details:
First of all, culturing foods is NOT an exact science. It is Forgiving.
- Don't be nervous. Just go for it.
- If you are a serious recipe follower, you might need to let that go. As I discovered with the kraut…there are different variations of the same recipe and they will end in generally the same result.
- Culturing depends on temperature, time and (some say) emotional climate. Your home is different than mine. Your kitchen might be warmer or colder. Some ferments may go faster or slower. That is okay. It is an individual process.
- Some things that work for me may not work for you. The woman who taught the Fast Ferments class makes cultured foods all the time in her kitchen. She has never had luck with using whey. It just doesn't work in her home. I use whey often and have no problem. Everyone can have a slightly different experience.
What kind of container should you use to ferment fruits and vegetables?
- Mason Jar with the metal lids/rings. My favorite hands down. I use wide mouth quart and pint size jars. Easiest and most cost effective.
- Pickle Pro
- Fermenting crocks
- I am sure there are more, but I swear by the mason jar.
To Salt or Not to Salt…that is the question.
- Many recipes call for salt during the culturing process. If you use salt, please use a good quality sea salt.
- Sometimes salt is added to help release the water that is inside the foods (i.e. when you add salt to cabbage, it pulls out cabbages own water, making a self-brine).
- Salt does act as a natural anti-microbial, helping to keep off the growth of the ‘bad' bacteria. However, it can also slow down the growth of the ‘good' guys. The longer the process takes, the more chance there is for error.
- I use salt (only sometimes I lessen the amounts if it seems excessive). The instructor of my CHFS class does not. There is no right or wrong. It is what works for you.
The Brine…keeping the system anaerobic.
- When fermenting fruits and vegetables, they MUST be below the water level, away from oxygen.
- This keeps the process ‘anaerobic' and helps to keep any molds, fungi, etc. from outside from messing up the process.
- Brine can be composed of a variety of things, but generally water + a ‘starter' or ‘inoculant' (something to add good bacteria to the mix). Can also contain salt.
- Always have your ‘brine' at room temperature before starting the ferment. This just helps things go a little quicker and easier. (I don't always follow this rule but it is helpful).
- Leave about an inch of headroom between the top of the liquid and the top of the jar. This allows for expansion. Do not leave too much room at the top of the jar as this will let there be too much oxygen and you have a bigger chance for your ferment going south.
What to use as an inoculant/starter.
- water and culture starter. The price may seem high, but each box of Culture Starter contains 6 packets. The entire box can make about 24 quarts of fermented vegetables/fruits. I use 1/2 tsp of powder per quart. (There are about 2 tsp per packet). It's a pretty good deal.
- water and liquid whey (how to get whey)
- freshly pressed vegetable juice and whey
- freshly pressed vegetable juice and starter culture
- water/juice and a probiotic capsule (or 2)
- liquid from a previous batch of fermented veggies (I know someone who used the liquid from a jar of Bubbies pickles to start a ferment).
- plain kombucha tea or other fermented beverage, such as Probellyotic
To weight or not to weight…that is another question.
- Fermenting weights. I just discovered these. They look pretty cool.
- Cutting a plastic lid to fit the jar. This works great to submerge the food. Just cut the top of a deli container lid to just fit the inside of the jar. I know this is plastic, not the best option, but it works.
- A river rock. Boil a river rock to make it sanitary. Use it as a weight.
- Ziploc bag full of marbles.
- Use your imagination!
How do I know when they are done?
Most recipes will give you a number of days for fermenting. Use this as a guideline. The temperature of your house and other factors will dictate how fast (or slow) the fermenting process takes place. Fermenting does continue to take place in the refrigerator, but at 38 degrees, this will be very, very slow. Flavors can change over time. I found this guide handy for answering this question. I like how she says “You are going to want to hit a sweet spot in between the “just began fermenting” stage and the “oops now my vegetables are mush” stage.” Basically, she states, you will know by:
- Bubbles: Generally there are bubbles produced from the lactic acid production. Sometimes, when you remove the lid, you can see these bubbles of gas bursting at the surface. Many times I see these bubbles through the side of the jar or can tell when liquid has oozed out the top of my lid. Sometimes there is almost a carbonated or ‘zing'-type flavor.
- Smell: There is a fine line between the smell of ‘fermented'- sour and ‘omg, this batch is rotten'- sour. You will learn the difference over time.
- Taste: This one is tricky because properly fermented foods will have a pleasant sour taste but will not taste like rotten garbage. (Think of the difference between the smell of kefir and rotten milk…both are sour, but rotten milk is putrid). Again, you will learn to distinguish the difference. 😉
Some additional tips
- When your food is fermenting, you may notice bubbling. This is normal and is part of the process.
- I put my jars on a plate or cookie sheet, to capture any liquid that may seep out during the fermenting process.
- If it looks like the liquid is less than you started with, you can refill to within 1 inch of headroom with filtered water.
- Fruit ferments fast (12-48 hours, depending on temperature of room) due to its high sugar content. Any longer than this and you will have alcohol.
- If you discover a white film on the top of your fermented fruits/vegetables, that is fine. Simply scrape away and toss that portion.
Cultured foods can make a huge difference in the way you digest food, the way you feel and the health of your body. Hopefully you will be encouraged to make your own!
Does the topic of fermenting baffle you? We created a Fermenting eCourse just for you and when you sign up, we will send you a Quick Start Guide! Grab the eCourse and the guide here!
Pin It!
For more information about Cultured Foods and their benefits, check out these videos from Immunitrition's and Real Food For Life's You Tube Channels:
Fermented Foods and Effects of Processed Foods:
What Are Cultured Vegetables?
The following books are great resources for learning about culturing and fermenting foods:
Nourishing Traditions by Sally Fallon
The Complete Idiot's Guide to Fermentation by Wardeh Harmon (Gnowfglins blog)
Wild Fermentation by Sandor Katz
Sources:
Taking the Mystery Out of Culturing Your Own Superfoods by Caroline Barringer
If you want more information about fermentation, ‘good' bacteria, and the health of your ‘gut', check out my other posts in this series:
This post is featured on Real Food Wednesday, Fat Tuesday, Simple Lives Thursday, Traditional Tuesdays, Whole Foods Wednesday, Fight Back Fridays, Fresh Bites Friday


This was incredibly helpful and informative. Can’t wait to get started!
Can’t wait to hear about your fermenting adventures! Be sure to share them with us!
Thanks for a well written and thorough article. I’m currently experimenting with Sauerkraut. I’ve made them in the past with just cabbage and salt, however this time around I thought I’d experiment so I emptied a capsule of some store bought pro-biotics in the jar. I’m wondering if anyone tried that with success?
Thank you! I have never tried the probiotic capsule method myself, but it should work…provided the contents of the capsule are still active. Let us know how it turns out!
This explains things very well! I tried fermenting apple cider (not organic) and added whey from organic 2% milk yogurt. Let it sit for three days then bottled it for 2 days. No fizz…I make kombucha tea and my house is so cold that it takes at least 3 weeks to brew before bottling. So maybe I needed to let the cider sit longer? Also, you mention that plain kombucha tea can be used as a starter. So could I use some kombucha tea with the Apple cider to ferment it? Thank you so much!!
Hi! I love your blog! I have searched your blog and other sites and can’t seem to find an answer, which is why I am messaging you…can I use plastic mason jar lids when fermenting fruits and veggies?
You could. They don’t give a tight seal and you may have more leakage, but it should be fine!!
Very informative article – thank you! I love how much information there is on the internet for self-teaching the ancient art of cultured food! I wonder could you give some guidance as to what is a good balance of probiotic capsules and salt, if using both? I’m supposing two capsules per 2 quart jar would be sufficient? And I’m wondering what amount of salt will help to resist the bad bacteria, without slowing down proliferation of the healthy ones too much?
I use 1/2 teaspoon of culture starter so would assume a similar amount of probiotics would suffice. Food can ferment without a starter, so adding the bacteria is really just a helper or inoculant. You can experiment with the salt. I like 1-2 tsp of sea salt per quart jar of veggies. Some people use more. Experimenting is half the fun of fermentation!
Also, I’m wondering is it necessary to add sugar or fruit when using probiotic capsules or culture starter? Any tips as to how much would be great. Thanks again.
Depending on what I am fermenting, I sometimes add sugar when using culture starter. Sugar gives the bacteria more ‘food’. Experiment and see!! Good luck!
Why is filtered water important? Can’t I just use my country well water – with no fluoride or chlorine added
Yes that would work fine. Lucky you having no chlorine in your water!!! 🙂
please explain and give references for anaerobic vs aerobic fermentation and what you use when,